Working in web client
Using web interface a user performs basic operations with the blockchain. In this section, we will look at the most popular operations through it.
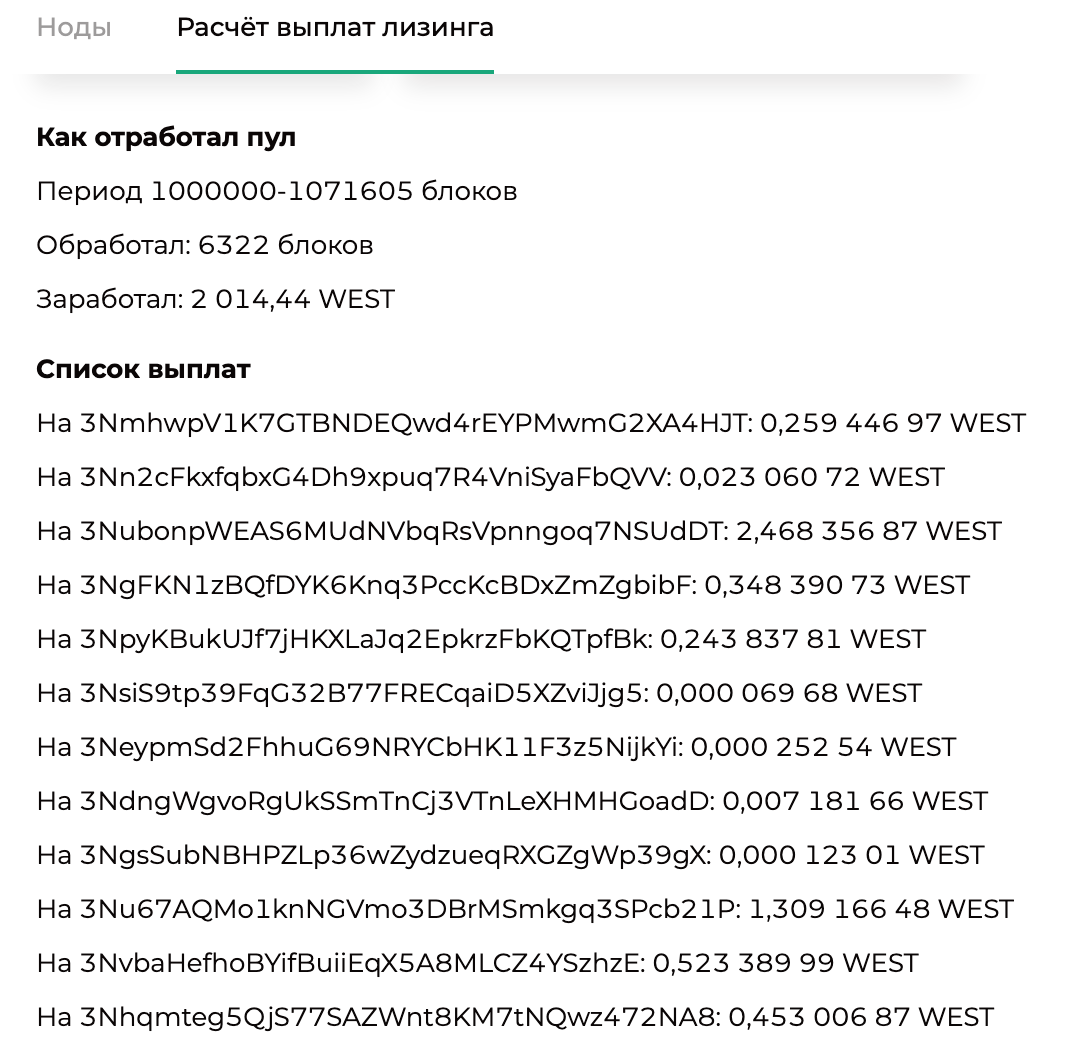
Calculation of lease payouts
You can read about the algorithm for the calculation of lease payouts on the client page. Leasing income is calculated on the page Network settings -> Calculation of lease payouts. Fill in the following fields:
Leasing Pool Address.
Beginning of the payout period (blockchain height), but no deeper than 200,000 blocks from the current height.
End of payout period (blockchain height). By default, the current height of the blockchain is taken.
Payout percentage.
Click Calculate payouts. The result of calculating payouts will appear on the page below.
You can also upload information about the calculation of lease payouts in json format for mailing to interested addresses.
Publishing and calling a contract
To work with contracts you need the contract_developer role. The contract samples are collected on the contracts tab and were not published in the blockchain. This data is taken directly from the Docker repository. Published contracts tab contains a list of all contracts created and published in the blockchain.
Using the client interface you can publish and call only the second version of contracts, which are working through gRPC. However, the Contracts page shows contracts of all versions. The contract version is indicated in its card, which is called when you click on an entry in the list of published contracts.
Follow these steps to publish the contract in the blockchain:
On the Contract images tab select the contract you want to publish to the blockchain and open its card.
In the contract card go to the Publication tab and fill in the Contract name field.
In the New key-value pair field specify as many value pairs as you want the contract to process. Select the data type for each pair (string, integer, Boolean, base64 binary data). This data should be specified in accordance with the logic of the contract code. After entering all the value pairs, click Next.
Check that all the entered data is correct.
For the publication of the contract then click Next. The contract will be published.
Then you can publish another contract image with new values again, or go back to the list of contracts.
Immediately after publication in the blockchain the container with the contract is assigned with an ID. This container can be called and updated later using this ID. You can create any number of contract containers from a single contract image in the blockchain repository.
Follow these steps to call an already published contract:
On the Published contracts tab select the contract you want to call and open its card.
Go to the Call tab and enter in the New key-value pair field as many value pairs as you want the contract to process. Select the data type for each pair (string, integer, Boolean, base64 binary data). This data should be specified in accordance with the logic of the contract code. After entering all the value pairs, click Next. The contract will be called.
Then you can call this contract again with different values or go back to the list of contracts.
The publication of a contract depends on its size. If the contract code is large enough, the transaction with the contract will fall into the blockchain within about 5-10 minutes.
Sending a data transaction
On the page Data transfer you can send transactions with data in key-value format. Follow these steps to create a data transaction on the Record tab:
Click Create data transaction.
In the New key-value pair field, specify as many value pairs as you want to fit in the transaction. In total, you can add up to 100 key-value pairs. Select the data type for each pair (string, integer, Boolean, base64 binary data). After entering all the value pairs, click Next.
Check that all the entered data is correct and click Next. The data transaction is published.
Working with privacy groups
On the Groups tab you can create private data exchange groups. For more information about access groups, see Data privacy. To work with data in private groups you need to add the address of the current node of the blockchain network. Your email address should also have the privacy role in the client. Contact the administrator of the authorization service to get this role.
Follow these steps to link the node address to the client’s account:
Open the account address management form by clicking the Address not selected button or the name of an already linked address in the upper-right corner of the interface.
Click Add address and select Add address from the node keystore.
Fill in the following fields:
Address name.
Node URL.
Node authorization type. The authorization type should match the type set on the node.
Blockchain address.
Key pair password.
Click Next to link the node address to your account.
Groups are created on the “Data transfer - Groups” tab. Follow these steps to create a new private group:
Click the New group button.
Enter the name of the group and add the addresses of participants to the private group. If desired, you can add a description of the group. For each participant you can choose one of two roles: data access or participants management. To exchange messages within a group, each address should belong to a blockchain network node and have the data management role in this group. Users with a client address in the blockchain network can be members of groups, but they do not have the ability to exchange messages within the group itself.
If necessary, you can add a moderator to the group. The moderator has the ability to edit the group participants and does not have access to the data itself, unlike a user with the participants management role.
Note
Deleting a group from the blockchain is not possible, you can only exclude all participants from the group.
Click the Next button and check that the data you entered is correct. If necessary, edit the group data.
Click Next to create a private data access group.
Messages are created and stored on the “Messages” tab in the private data group card. The card opens when you click on an entry about a private data group.